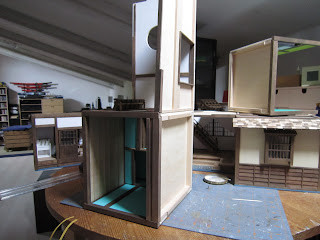
April 12 - 16th 2013
I was keen to get started on this phase of the room build because I was going to try a method to make the floor of the tokonoma as lacquered and shiny as possible.
I had read that what was needed was to paint, then gloss varnish, sand, varnish, sand, varnish etc. So that is exactly what I did. I don’t remember how many layers I did in the end (maybe 5) so in between waiting for the varnish to dry, I built the little table. It was easy enough. Just had to paint and then varnish that as well. Once the varnishing stages were completed, I moved on to waxing. I read in the same blog about using regular furniture wax so I bought a tin of neutral color and used that. Just spread it on with a cloth and waited around an hour, afterwards buffed it up and wiped off the excess. I must say the floor is quite shiny and soft as butter. This confirms the method I will use when I get to the last room which has a wooden floor instead of tatamis. Very excited.
 |
| Varnishing and sanding the tokonoma floor. |
 |
| You can see the difference just in the repeated varnishing and sanding. The little table top is on the left. |
 |
| Adding the wax. |
 |
| Backside of the little table. Working out the position to glue the legs (in the background) |
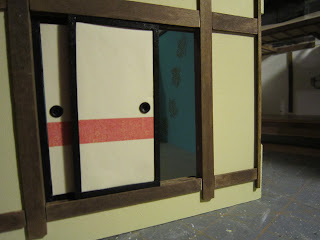
The fusuma were the usual although the instructions were a little off. Thank goodness I had already done a few so I new how to adjust and make the pieces fit. Lots of fitting and sanding here. I used the kit’s fusuma decoration for the outside of the doors but I used Japanese themed paper I had found in a
shop in Florence. I admit I was a bit distracted applying the paper and even warped out the doors doing so (had to pull off the outside paper and redo it - the kit came with more than one paper panel so nothing lost) but I had a good excuse. I was working on the doors whilst listening to the goings on right after the Boston Marathon bombings. It had just happened so I was clicking like crazy trying to find news and figure out which of my marathon running relatives and friends were there. Seems as of this writing friends and family are fine but I wasn’t really concentrated on the fusuma so I ended up leaving it for the day after. They’re not as clean or well installed as the others but that’s ok, I’ll remember why.
 |
| Front paper decor attached, just measure and cutting the back. The paper is a double face so I can use the other side to decorate other parts of the house. |
 |
| The paper now glued in place. |
 |
| Once of the two doors was very warped so I had to invent some way of glueing the frame in place overnite. |
The last bit was the retaining piece in the front which holds the tatami in place. I organized the tatami so that the color differences were a little less evident then just had to wait till the retaining piece was good and dry before “forcing” the tatami in place. They look fab! And so does the little table.
 |
| Waiting for the front retaining piece and fusuma framework to fix in place. |
 |
| Outside of the room (a little damaged on the right - will repaint a bit) |
 |
| The fusuma and tokonoma floor. |
 |
| Finished fusuma and little table. |


