Showing posts with label sliding windows. Show all posts

Wednesday, July 30, 2014

Chapter 87 - The Sliding Windows to the Left Side Second Floor Porch, Two Chairs, A TV


July 26th - 30th 2014

This chapter just has a few objects to provide a little distraction before embarking upon the railings and awnings of the porch.  The windows were straight forward as was the TV (having already made a few) but this time there were two new chairs to construct.

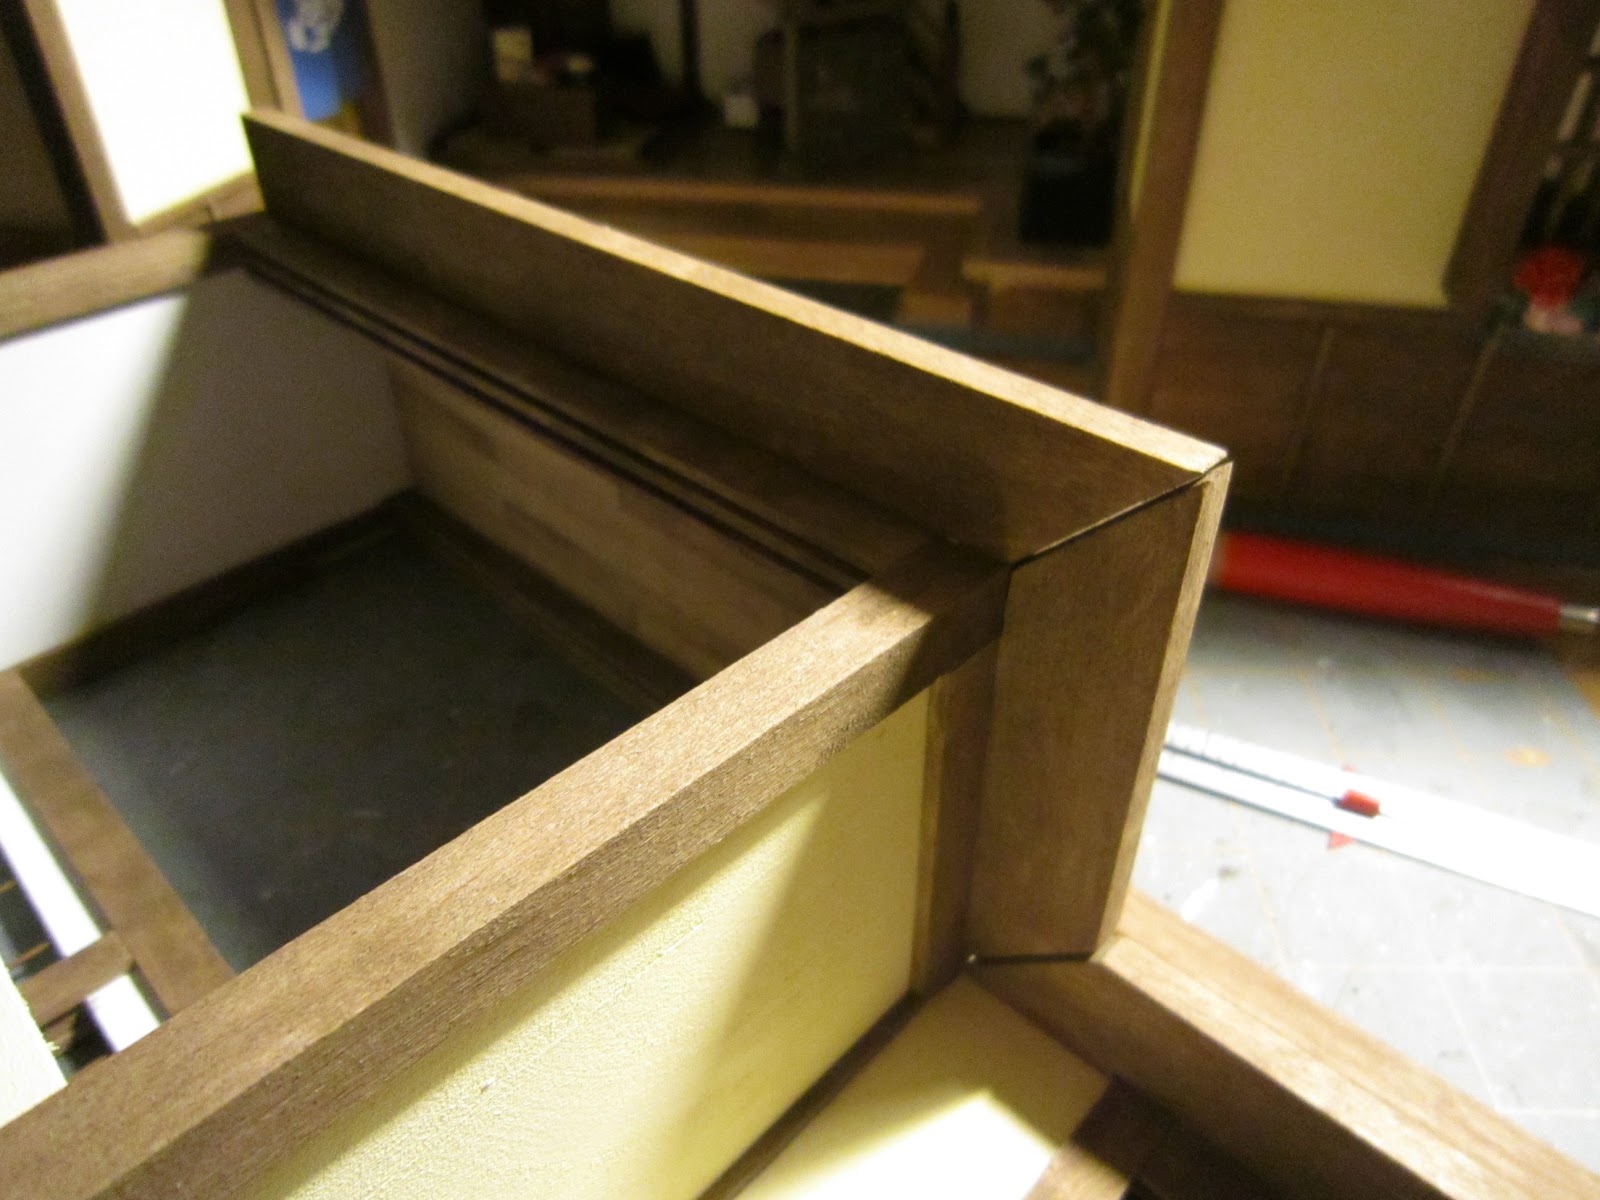
So, first thing I did was to paint the sliding window pieces and the two support pieces the usual brown.  Then to glue up the windows and add the panes.  Last step was to aggressively sand down the piece where the windows get slotted into place.  Then the final two windows were inserted.  Then, I realized this was the last porch window set I would be doing.  Hurrah!!
You can see the space where I had to sand down for fitting the sliding windows.
Windows in and functional!
The next step was the TV.  I did some searches on the net and found that the TV’s in the kit are very closely modeled after actual 1960’s Japanese television sets.  Which is pretty neat that they would be so attentive to such a detail.  But since I already had two TV’s in the house and honestly I didn’t know where to put this one, I decided to make a portable TV.  So I had to look for some pics and I did find quite a few from that time. 
Cheesy 60's portable TV - inspiration.
I liked the color combinations especially (powder blue and beige) but I had to bash the kit a bit to make the TV portable. I cut back the side pieces and rounded the edges.  I then painted the TV a sort of blue (I don’t have any blue! So had to use some light Williamsburg Blue) and the buttermilk.  I then painted the front of the TV grey (it’ll be turned off) and the dials gold.  I also used a 0.05 fine point marker to ink in the black stripe in the front.  After letting the paint dry, I glued the TV into it’s cabinet and painted the whole thing with a bit of varnish.  I then added the antenna to the back and a handle to the top (which was a metal collar clip from my son’s new dress shirt).  I think the TV is pretty funky!  It’ll look better once it’s positioned downstairs in the kitchen.
The TV cabinet before shaping.
After shaping and a little color.
Finished cabinet and TV ready for insertion.

Finished portable TV.

TV ready to entertain the busy cooks.
Next were the two low chairs.  There were quite a few small pieces but went together quickly.  Once glued, I just had to sand the straight edges a bit then paint them black then varnish.  Next were the seat cushions.  I was undecided on these since I was unsure if leather was actually used on these types of chairs.  I really wanted to use the leather even if I couldn’t find many examples of leather cushions so I cut out some pieces on the bias, trimmed them and used double sided tape to attach the leather to the cushion piece.  I am really glad I did use the leather since the final result is quite nice and the leather fabric, being a coated fabric and faux leather, didn’t unravel during the cutting and fitting.  Very clean final look.
The low chairs before sanding and smoothing the edges.
Cutting the second leather piece.

Finished low chairs with leather cusions.
While I was working on these pieces, I had come across an artisan on FaceBook named Antonio Malacario who makes miniatures for manger scenes.  His work, especially the bird cages and iron work, are very detailed and special.  I came across a cage that would look great in the outside kitchen area and seemed small enough to fit.  Unfortunately, by the time I contacted him, it had been used in a manger bell dome scene and he didn’t have any others immediately available.  But he did have some other cages.  After a few sessions of messaging, he came  up with a cage that satisfied me so I purchased it.  (He accepts PayPal).  He was so nice I figured I’d risk it.  Who knew.  Maybe I just threw away €40.00 but at least if it did arrive it would be nice (I hoped).  All my doubts were erased when the package arrived from Naples today less than a week after the purchase.  The cage is absolutely gorgeous!  It’s the beat up look, stained and dirtied, the little door opens and it even has a removable tray under the birds (which he included) and a feed trough which removes as well.  The only thing I changed was that I put some Japanese newspapers in the bottom tray and dirtied it up with some bird poo.  I think it looks great!  I obviously had to figure out a way to hang it from the pergola so I used some leftover pieces from the TV set and made a hook and glued it to the upper pergola.  Fantastic!
Antonio's super bird cage. Door opens and bottom tray slides out.
I added some poo poo'd Japanese newspaper in the tray.

Sliding feed tray for my hefty birds.
Bird cage in place!
And the kicker is he included a few little extra surprises.  A little fork (which will go outside in the outside kitchen cabinet with the hibachi), a small soup container and lid and the best was a LED lamp with a tack like way of attaching to the house.  Basically, I had been thinking of putting a LED outside in the pergola area but I couldn’t find anything that I liked.  I knew it had to be rustic - like a naked bulb or something.  Well, Antonio must have read my mind because this lamp is super perfect!  The only small problem is that the LED is a 12v but I’ll try and figure out a way to light it up! 


Extra little surprises in the package.
"Un caro saluto da Antonio"
What a treat! Like Christmas in July!!
Excellent.

Tuesday, July 22, 2014

Chapter 83 - The Back Wall and Sliding Windows to the Left Second Floor Porch

July 17 - 22nd 2014

I haven’t been building the kit following the instructions per each chapter as sometimes things can get repetitive and I end up creating other objects (like the sake barrels or the outside areas) to keep things interesting.  But since I am still out of work, I feel like I really need to finish the build by the end of this year.  I feel like I need to accomplish something to keep my brain challenged and maintain my sanity.  I always have lots of projects but rarely ever complete them.  The last time I was not working (14 months I stayed out of work to get myself healthy) I completed so many things.  And that was before I even started on this house!  I was so proud of myself.  I want to complete this project if only to be able to say it will be my “capo lavoro”.  I have put a lot of my heart and soul into this.  Someone said once that miniature creation is a small version of what you cannot have in real life.  I think this is true for me.  I actually imagine myself as the ryokan owner planning and running the everyday function of the inn.  There was a time when I dreamt of owning a shop or a tea room.  Things that will never come true given my situation and what is available to me.  So, this house is truly my dream house.  Just like Barbie! 
I wonder sometimes what will happen to it when I am gone. 
I had started writing this last week with my reflections on what remains when we are gone and then the air tragedy over the Ukraine occurred.  I hope that the families will find something that can so poetically embody their loved ones like this dollhouse will me.  I could disappear before I finish it, but still you will see me in it.  In a way, our artistic creations make us immortal. And each of has (or had) the capacity of creating art around us.  Some in being simply mothers or fathers, sisters or brothers.  Others in their scientific research.  Our actions now, and how they touch others, are what will make us immortal.  Their effects will be passed down from generation to generation.  Just like this house.  Hopefully.

Anyway, back to the build.
This chapter covered the back wall and windows to the remaining porch. I didn’t document every step as it has already been done previously.  Needless to say, it went together quickly and without fitting problems like I had with this same section on the last porch.  The only thing was to pay attention to the painted panels (Buttermilk on the outside, white on the inside) and making sure that the notched pieces for the shōji were on the right side this time (to avoid having to install the shōji thru the front porch windows like last time).  Otherwise, it came together smoothly.  Course I was busy this weekend so I didn’t do anything for two days.  But I made up for it on the Monday and am posting this on a Tuesday morning. 


Painting and preparing.
Finished back section to the porch.
And the build continues....

Tuesday, July 8, 2014

Chapter 81 - Bannisters and Shōji for the Right Side Second Floor Porch

July 7th - 8th 2014

I started first by trying again to install the front porch windows.  This took a lot longer than I thought as I had to slowly sand down the one piece that fits the inner sliding windows.  All of my windows (and doors) slide.  I wasn’t about to give up on this one porch because the doors were so tightly fitting.  So after a few millimeters of sanding, testing, sanding etc. I finally got the windows to fit.  Now I just had to glue the beam in place and let it set.  You can see in the foto where I had to sand down so much but this part is actually hidden when I install the outside panes.  So I wasn’t too concerned with it being clean or perfect.  Just the windows had to slide! 
Gluing the cross beam after massive sanding.  You can see the uneven edge.  It will eventually be hidden.
Next was making the final two shōji doors.  They went together quickly.  I didn’t like my leftover shōji paper so I cut some new pieces that would look nice when light shines behind them.  After gluing them to the back of the door, it was time to mount them to their sliding beam.  I had mounted the previous windows backwards since, like the front porch windows, the back side windows get installed before the front ones.  It’s because there is a running piece of wood that fits across the top of the windows and holds them in place.  Different from the front ones which need to be inserted into their respective slots above and below for them to fit (which is why I had such a hard time with the front porch windows).  Anyhow, since the final piece just gets glued across and holds them in place, it was fairly easy to install from the inside of the room (although had I done it right, I’d be installing from the outside of the room - so...I screwed up! What can I say.  I had done two porches already and I guess I forgot this detail...) so I painted the piece and installed the shōji by dropping the final piece into the room and positioning it in place.  I tested the windows to be sure no glue had gotten inside the sliding area.  They slide just fine! So since the porch was laying on its back, I then installed the front porch windows dropping them into place and gluing the final piece across to hold them.  Success! And they DO slide!
The two shōji windows.

Fitting the top cross beam which holds the doors in place.
Finished shōji doors.  They DO slide.
Adding the upper cross beam to hold the windows in place. And these slide too!
Next up was the bannisters that get installed on the outside of the porch.  There are a few steps that add to the overall look of the ends of the bannisters so I had to glue small pieces in place that then needed to be sanded down to shape.  So I had to glue then leave the glue to set before shaping the ends.  Once set, I sanded them down to shape, glued them in place, painted the bannister, varnished it and installed the bannisters into position on the porch.
Top before shaping, bottom after.

Bannister ready for varnishing.
Onwards! I’m on a roll! (See what happens when you have extra hobby time!)
Porch nearly completed.  Needs just the awnings.

Sunday, July 6, 2014

Chapter 80 - The Tatami for the Left Side Second Floor Porch, Two Sliding Windows for the Right Porch, a Small Table

July 6th 2014

Everything in this chapter I had already constructed in the past so I knew it would be fairly quick, or so I thought. 
I put the windows together and the small table.  Then I painted all the parts that required painting and then varnished the table for a slight shine.
The next part was putting the windows into the porch but I realized that I had mounted the shōji windows backwards and if I now put in these windows, I wasn’t going to be able to finish the shōji properly.  Since the last two shōji are in the next chapter, it really doesn’t set me back much. So I put the “glass” into the windows and set them aside till the next chapter where they will be installed.

The last part was the last two tatami in the kit (yeah!!!!) and if you’d like to see how I put them together, you can visit my previous blog posting that gave a pretty detailed explanation. 
With the completion of this chapter 80, I am officially 2/3 of the way through the kit.  Hallelujah! Maybe I will finish the ryokan this year!

Saturday, September 8, 2012

Chapter 58 - The Ceiling to the Right Porch, the Sliding Windows


September 6 - 7th 2012

The ceiling was the same old installation.  As usual, the pieces to never fit to perfection so I had to coax and glue them in in some ares.  Overall it wasn’t that bad a fit.  Consider also that the external top of the ceiling is actually hidden when the porch (which is the “door” to the dollhouse) is in the closed position. 
Painting the pieces.
Spacing out the beams for the inside of the ceiling.
Glueing in the internal "wainscotting".
Positioning the ceiling....
...clamping it down into position with the wooden trim

As for the sliding windows (construction of which you’ve just seen recently), I had to actually insert them in “backwards”.  This porch area had me building a little against logic.  The other porch section went better because I actually had to install all the windows and shōji before I put in the railings.  That way I could manipulate the porch while installing the wooden window tracks and fixing the final pieces.  So, I ended up having to install the piece that fixes the last two sliding windows in place from inside the porch room.  Tight to work on since the shōji were already installed and I was afraid of damaging them.  Got everything in tho...in the end.  Where there is a will there’s a way.
Wooden piece, had to slide it in between the installed shoji and position it without glueing the actual sliding windows to it.  So far, all my windows and shoji slide !

Finished porch

Skipping chapter 58 as it has me putting on the awnings and I’d prefer to actually attach the porches first, then put on the awnings.

Sunday, September 2, 2012

Chapter 54 - The Sills and Sliding Windows to Right Side Porch, A Table


September 2nd 2012

This installment went pretty quickly again because I had already done this assembly once before. 

Made two more sliding windows using the same method as the last chapter.  Then I added the sills which fit fairly well together.  Just a matter of penciling in the tile lines, varnishing with diluted varnish (so not shiney) and adding the underside beams.  Again, I am deciding whether or not to paint the ends of these beams with a little white or something to have them stand out.  Overall, I’m undecided to finish the exterior in a rustic manner or in a well cared for manner.  The inn is really not low class but I figure maybe middle class so I could add some worn out paint on the outside beams.  I would like to have some exposed brickwork on the sides too - like the cement finish is coming away from the building.  I will also have to decide whether or not pigeons would be causing damage under the eaves of the porch areas - and pooing.  I like the idea of the ryokan being in need of a bit of repairs.
Matching up the pencil lines for the sill tiles

Adding the platform beams - view from the top with the porch on its side

Adding the sills

Adding the small beams under the larger platform beams

You can see the windows in the works.  Little table with glue setting up


There was also a small table in this chapter which I painted a burnt sienna - sort of like 1950’s side tables.  I may even paint the legs black to give it an even more dated look.  Very cute in any case.
Little table, two more sliding windows, porch with the sills finished

Saturday, September 1, 2012

Chapter 53 - Right Hand Room First Floor Ceiling, Sliding Windows to Front Porch, Floor Lamp


August 25th - 1st September 2012

I started straight off with the floor lamp thinking it was going to somewhat easy but I was so wrong!  Tiny little pieces and cutting out smaller pieces to size.  Gluing was a nightmare because the pieces were so tiny.  But I did pull it off in the end.  I also used a few extra pieces to make a little desk lamp which I will probably put in the bamboo room even if there is no light on the inside.  I have it in the foyer for now...it is cute there too.
Very small pieces....

...placement with tweezers then painted and varnished...

...glueing the supports to the paper.
Finished lantern.  Can't even fit a LED inside it's so small.
Extra pieces and paper.  You can see the kanji only when it's lit.


I then attached the sliding windows.  I glued and painted them then when I went to install them, I realised I had attached the upper sill with glue instead of double sided tape!!  It was not supposed to be installed permanently.  I nearly broke the wood trying to pry it off.  I had to touch up the paint on the outside since it got all scraped up during the attempt to pull of the piece.  In the end, I got the windows in (fitting one side by sanding down the previously glued area) and then just fitting the back piece.  I was so relieved I managed to get that piece off !!
Glueing the windows that then had to be stained.

1/4" double sided tape made quick work of attaching the window panes.

Placing the windows - view from inside.

Outside view.  You can see where I damaged the paint job a bit above the windows.


The last part of this chapter was the roof to the bamboo room.  As usual, the ceiling piece was warped and I had to try lots of different methods to remove the bow.  I got most of it out but it was a few days between wetting the wood, clamping it down etc.  Attaching the front wooden piece took some creative clamping too.  Then I just measured off the spaces and glued in the “beams” across the ceiling.  It was only half way because the tokonoma uses up part of the room.
Wetting the board and clamping it over a dowl to dry overnite.

Glueing the front wood section.  I had to clamp a smaller piece of wood to force the bow to glue onto the section. 

Measuring out the pencil line - just deocration.

Glueing on the "beams" that run across the ceiling.

Finished ceiling for the bamboo room.
At this point, I have been checking the upcoming chapters and they have me jumping around a bit.  I’d really like to complete the porch areas and attach them since I am afraid to leave them around unattached in my attic room - I know I’m eventually going to knock them on the floor or something.  So, I will be splitting chapters up into parts since some chapters cover completing parts of the porch and others continue into other sections of the build. We shall see how this kit shapes up in the end.