|
| Small scale bamboo type mat |
April 7th 2013
Starting work on another bedroom on the second floor right hand side. That means tatami mats.
Since I’ve noticed that many people are looking for how to make these mats, I figured I’d show what this kit came up with for a solution. I thought I could give you a step by step even if it’s from a kit that may help you make your own tatamis. I have made so far 12 of these and have found a few short cuts and methods that makes short work of what used to be a very long and tedious job. I made these six mats in 2 hours flat.
That actual matting smells like woven bamboo reeds. As you can see, it’s important that the matting is tightly woven so that the scale is maintained somewhat. I suppose anything can substitute, including fabrics, as long as the weaving is small.
 |
| Penciling in the cutting line using the actual wooden piece |
The kit comes with six 3mm thick wooden flats of 44mm by 86mm. The room to be decorated is approx. 12cm by 16cm so you have to work out how the six separate matts would lay out on the floor. Traditionally the
placement is as per the previous chapter for tatamis. But I suppose it all depends on the floor you’re working on to cover.
 |
| 6 mat pieces |
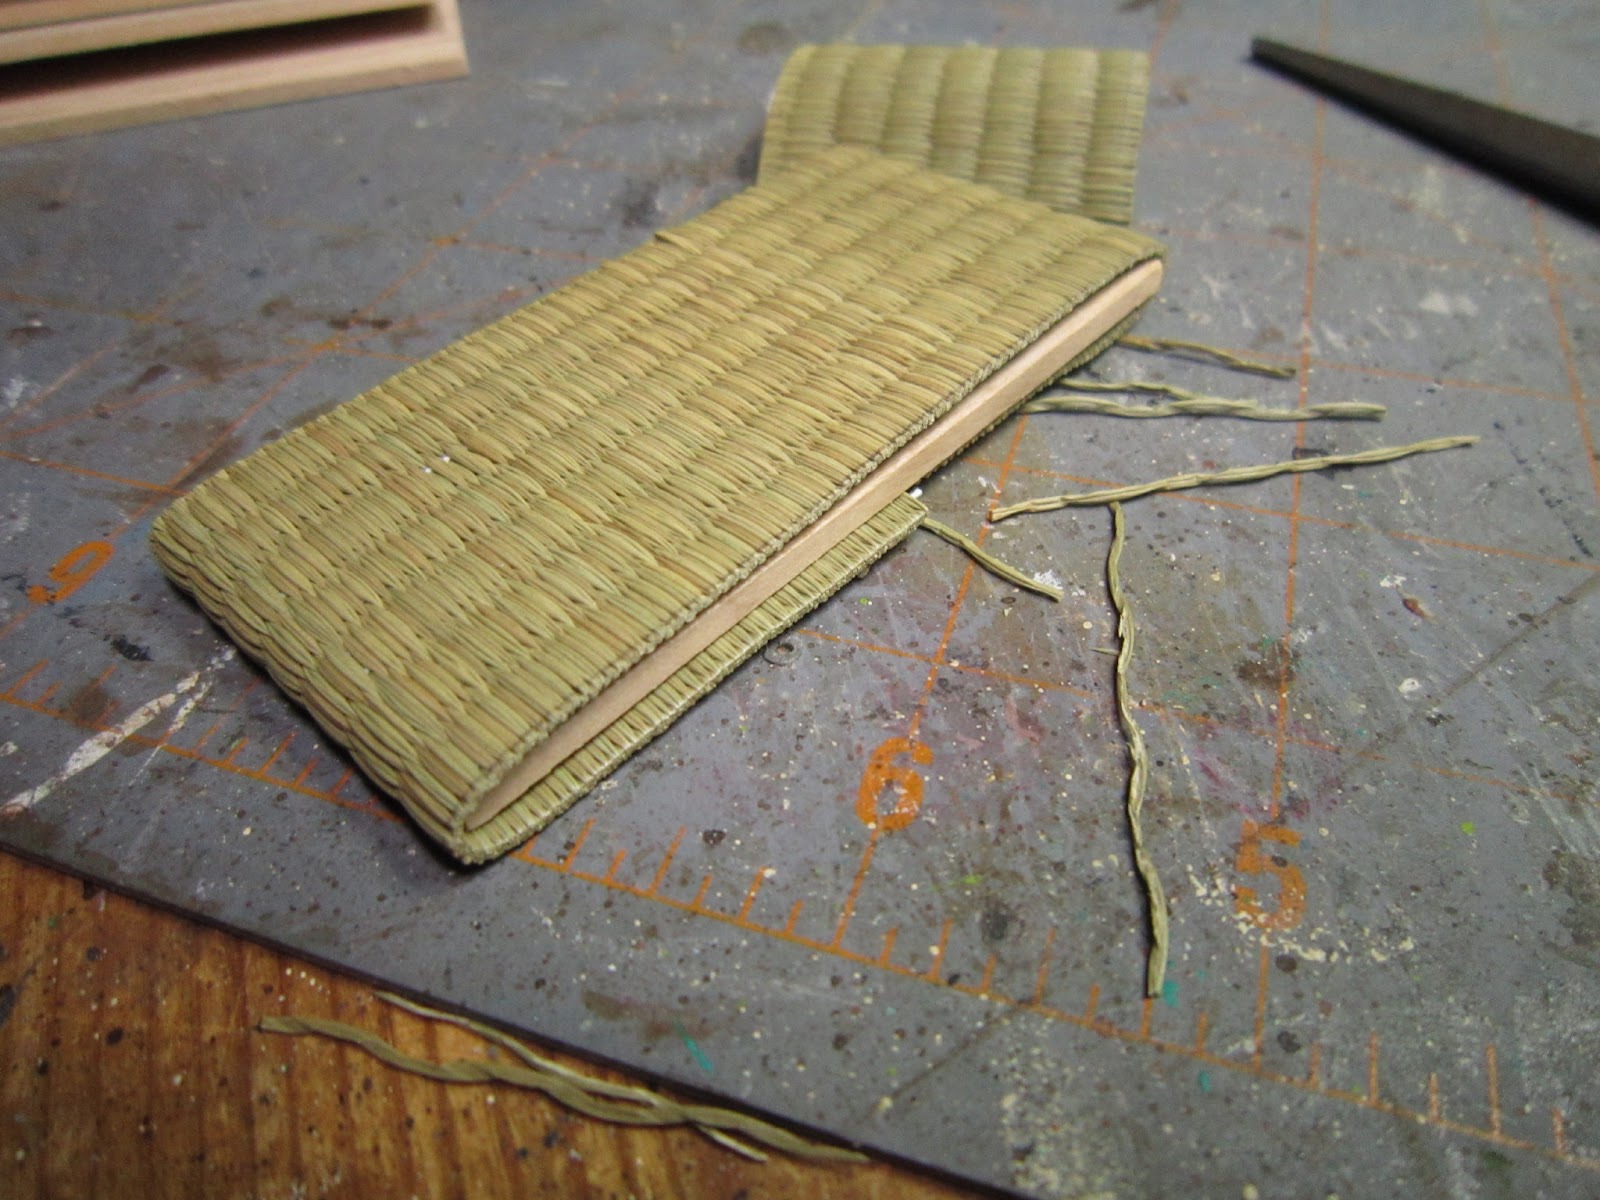
Anyway, once you work out your own dimensions, I just used the actual flat pieces to measure where to cut the bamboo. I then taped some double sided tape wrapped around from back to back fairly hugging the edges but not quite meeting at the back. The reason for the space on the back is to allow room to cut and to unravel the mat and flatten it as much as possible. I then wound the cut matt around the wood very tightly. Should the mat be too wide covering the wood, just trim it back. It’s important that the matt is cut quite close to the edge of the wood. It doesn’t matter much if the cuts are not perfect as all the edges of the mat will be covered in fabric of some sort. Keep in mind also that the double sided tape will not hold overnight so the passage from applying the bamboo to the wood and the subsequent application of the binding fabric on the edges should be done at the same time.
 |
| Cut mat ready for wrapping |
 |
| Wrapped pieces with double sided tape |
 |
| Taping the mat to the wooden support |
 |
| Trimming the excess bamboo |
 |
| Trimmed and ready for the fabric edging. |
The fabric the kit provided is very lightweight black cotton. Each piece was around 8cm by 12cm. They had us cutting the fabric in half to end up with 4cm by 12cm and then again to end up with strips of 2cm by 12cm. The next step is applying a 6mm double sided tape (
purchased at DHE) to one side. You then can easily make a finished edge by folding the fabric over the 6mm taped edge. Next you can apply a second strip of 6mm tape to the unfinished edge, and another to the finished edge. It’s ok if they overlap a bit. You are going to remove the finished edge strip first so it’s important that you apply that tape last.
 |
| Fabric cut in half.... |
 |
| ...and cut again. |
 |
| Add the tape to one side... |
 |
| ...then fold it over on itself to create a clean edge. |
 |
| Then add another strip to the unfinished edge... |
 |
| ...and to the finished edge again. |
The kit came with a small tatami template which assists you in applying the fabric edging to the mat. In this case, it is just a piece of wood with a raised smaller piece of wood (about 2mm in thickness and 10mm wide) attached to it. This helps you to place the fabric strips against a straight edge onto the mat. The template is 100mm by 51.5mm so that when you lay these pieces of tatami, they line up just right to the edge of where the fabric needs to be placed.
 |
| Template. Used for other trials as well (hence the holes and color tests :)) |
Line up the mat with the right side upwards.
 |
| Lining up the mat and taping. |
Remove the tape from the finished edge of a fabric strip and position it so that the excess on each end is the same. That end will have to be folded over later to fix the fabric to the wrong side of the mat.
Remove from the template and turn the whole thing over and trim the side edges to form small pieces to use to finish the edge and fix the fabric to the back of the mat. Roll the entire mat onto your flat surface which will help to adhere the tape to the side, then to the back. Lastly, fold over the flaps on the edges to finish.
 |
| Cut away a small corner to make flaps. |
 |
| Roll the whole mat onto a flat surface to adhere the fabric. Then turn up the edges. |
 |
| Put a few drops of glue on the top edges where the fabric usually pulls away |
I add one final step to be sure my fabric doesn’t unattach after time (something I noticed having done many of these). I apply a drop of quick drying gel glue with a toothpick under the top flaps of the fabric. Then I clamp the whole thing against another flat surface and allow it to dry for a while. By the time I get through the other 5 mats, the first one is dry and well fixed. You could stack them as you go and leave them overnite but it’s really not necessary. More than anything, leave them out to see if the fabric unattaches so that you can use more glue to fix them edges better.
 |
| Finished tatami mat. |
 |
| Placement of the 6 mats |
And that’s it! All I can say is thank goodness for double sided tape!