November 22nd - 26th 2013
This chapter is for the installation of the hanging ceiling hook to hold the kettle over the fire pit. From my research, usually there is some kind of room for cooking over a coal or wood fire in an open pit. As previously mentioned, it is not usually also a sleeping area although I have found some evidence that it could be. I’m still undecided on what I’m going to do with mine.
In the meantime, the ceiling beam had to be prepared. The kit furnished a beam that just needed some widdling but I decided to use a branch I had found when I started this kit (the other branch I found I used in the music room). I cleaned it up (this one smelled but not as quite as badly as the other which was still fresh), sanded it, painted it and then went thru the usual stages of varnishing, sanding and varnishing. While waiting for varnish to dry, I could put together the other objects needed for this room.
 |
| The original branch. |
 |
| The branch now carved down and knotched. |
The hook is attached to a traditional piece of bamboo. I preferred to keep everything black and painted the bamboo black instead of brown. The fish required some shaping and sanding, then some carving. It came out pretty good considering the size of the fish. I did find a few tools that did the trick but I don’t own tiny sculpting tools so I just used the exacto knife. When I finished with it, I painted it black as well (I guess the fish is actually supposed to be ghisa) then varnished that and the bamboo rod.
 |
| Shaping the fish..... |
 |
| ...then sculpting and carving it a bit. |
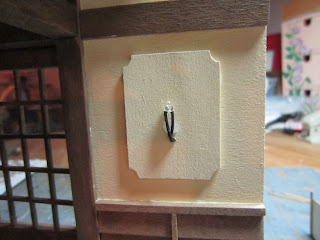
While those were drying, I went back to the branch and figured out a way to attach it as an overhead beam. It was slightly shorter than the kit’s piece so I sawed off a tiny block from the kit’s beam and glued it to the left side of the wall. That way, I could have the thin branch end resting on it. I generously glued both sides and let them set overnite. I also decided to attach this room to the hall and finish the second floor unit. I won’t attach it to the house just yet as I still have to install the final stair section in the hall. But that comes later.
 |
| Glueing the beam into place. |
 |
| Glue the room into place. Best way to keep constant contact and use a vice. |
Once the fish and bamboo were dry, I worked on wrapping the hook from the kit around a smaller piece of wood and glued the string in place. I then glued on the overhead rope and the metal mid support and hung the hook in the room. I think the fish looks pretty convincing. Perhaps I shouldn’t have varnished it so much, altho I can still dirty it as I suppose hanging over a charcoal fire it wouldn’t be so shiny. I painted and attached the handle to the tiny pot. I will probably fill the pot with some kind of contents at a later date.
 |
| Fish, hook and stabilizing rod in place. |
 |
| Testing out the whole assembly. |
The final part of this chapter was building the ceiling to this room. Since we still have some work to do in it, the ceiling is just positioned and will be glued down later. While positioning it tho, I found that the beam on the right unattached - the ceiling is a tight fit. So I had to cut another small block to support the right side of the beam too. As long as it holds it up, I’m ok with it.
 |
| adding a little support. |
This ceiling had the beams running front to back instead of side to side. It’s nice that there is a little variety as each ceiling up to now has been exactly the same. I won’t be drilling a hole in this ceiling as I don’t think a lamp or lantern would be hanging in this room if there is a fire pit in the center. I’ll make a lamp instead to install from the back wall.
 |
| Penciling in guide lines to install the ceiling beams. |
 |
| These running back to front. |
 |
| Finished ceiling and fire pit assembly. |
Next up - the fire pit.


