Monday, October 22, 2012

Intermediate Work : A Hibachi Grill


October 18th - 22nd 2012

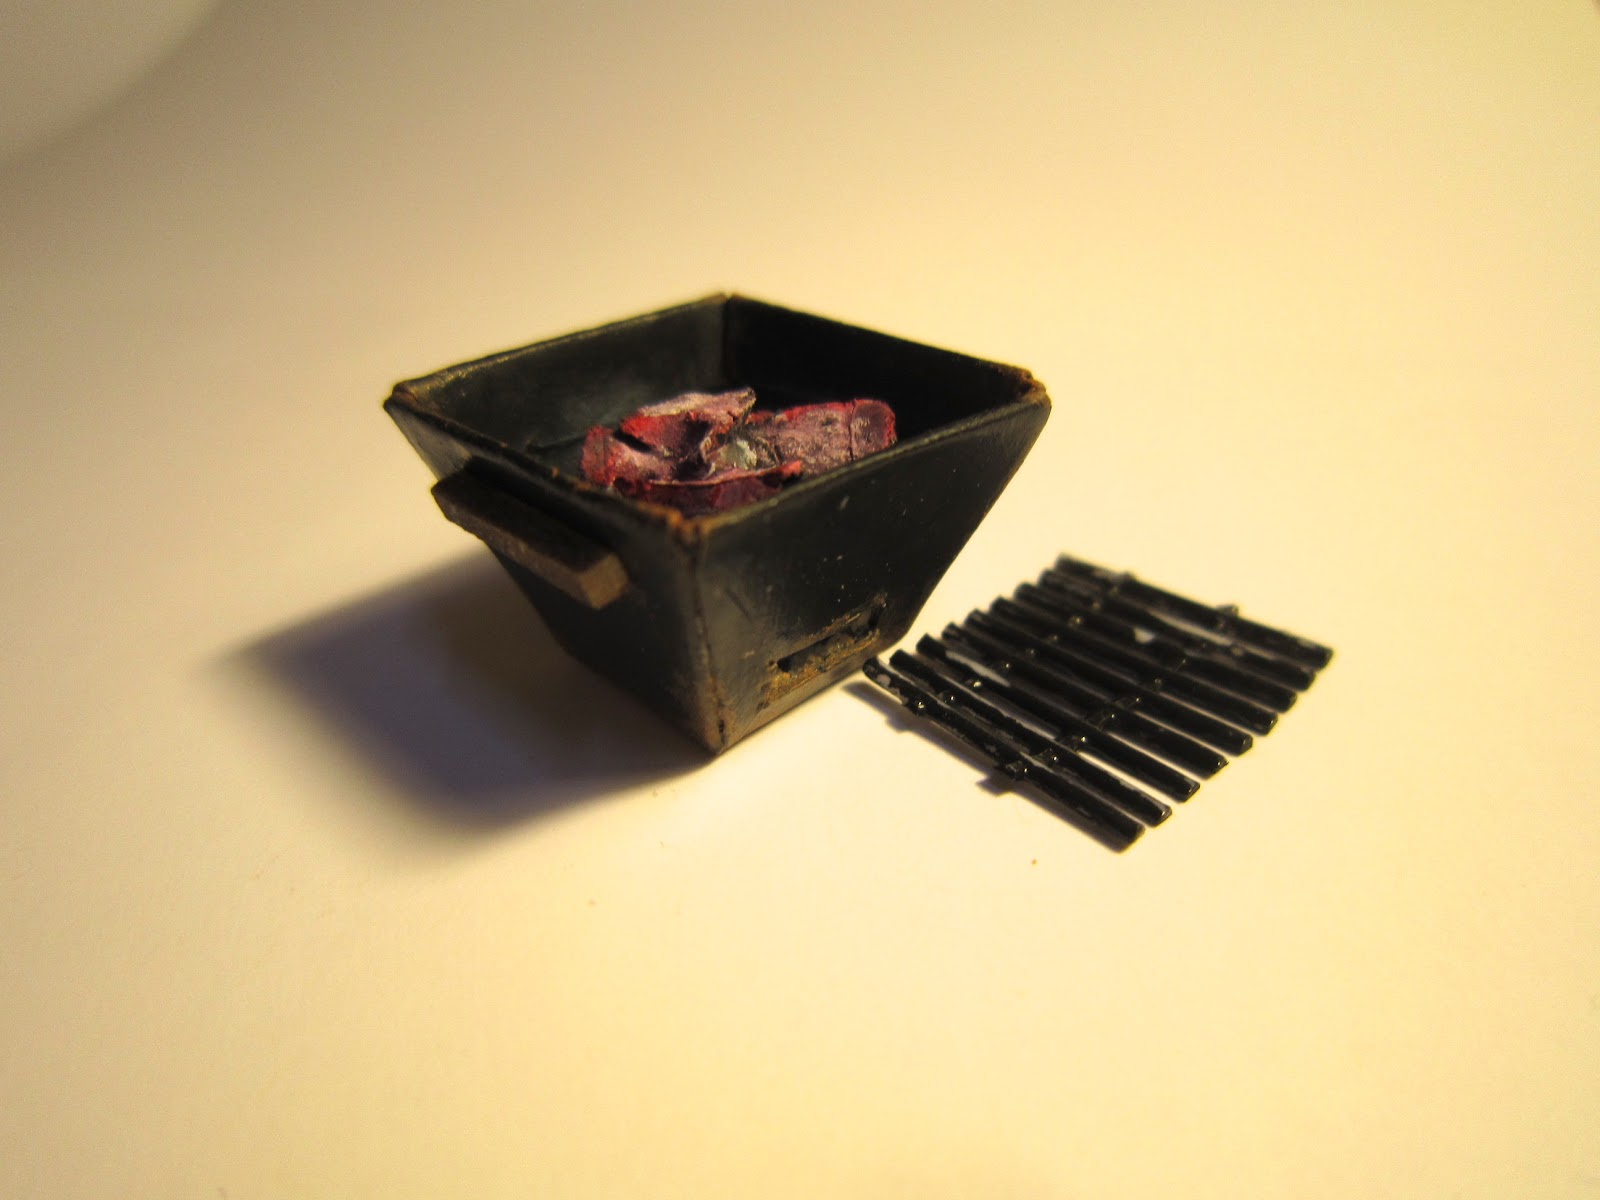
Still working on some Halloween decorations but in between waiting for glue to dry, I found this really cute free hibachi printie.  So I had to make it.

Just to explain, a hibachi is a small grill that usually in America is used outdoors but in Japan can also be found in a table version.  They are usually also made of cast iron (ghisa) so they are pretty resistant to rust.  But I had two ideas for my hibachi.  One would be a grill that can be used in a room but also that it has been well used!  I wanted a little rust and dirt on my hibachi.

The printie was scaled down to my 1/20 size more or less.  I then glued it together and painted it black.  I also gave it a second hand of water/glue to harden it up and make it a little stronger.  I used paints and some fine grain sand to simulate the ash filled fire worn interior.  I’m surprised how effective this was.
Fine grain sand and some white and grey/blue paint for ashes.  Terracotta color for rust.

I used one of the plastic sink strainers (the ones I found 6/1 euro and made a basket of one in a previous post) and cut them up to make the grills.  A little paint and sizing and the grills look pretty good.  The last addition was to make some coals.  I had bought some “coal” when I went to Miniatur Wunderland in Germany (instead of black gravel, it’s actually cut up rubber which is pretty cool because you can cut pieces smaller or larger as needed) so just needed to paint them a little to simulate hot coals. 

Glueing the coal to the grate.
Top grate - empty habachi
Removeable coal fire.

With the top grate.  Just need some food for grillin'!

Now all I need is some food for my grill !!! (my next internet order...till I learn how to use Fimo clay I suppose.)

UPDATE
28th October 2012

Added a fish and some steaks to my hibachi.   

Sunday, October 14, 2012

Halloween Break !

The Haunted Halloween Mansion

October 5th - 14th 2012

Ok, so as usual, I am easily distracted.

I am working on planning a little Halloween decorating (since here in Italy it is not really celebrated or it’s celebrated the wrong way - with fire crackers and general tricks instead of treats) which I usually do for a selected group of friends and their kids.  So I like to do a nice table with scary stuff and sweeties.  As I’m searching around, I came across some really cute printable caskets and coffins to be used for putting candy or whatever on the table.  As I’m navigating the page, I realise that this page, Ravensblight, also has a printable haunted house.  Now THAT is just what I needed!

When I was a kid (young like maybe 11 or 12 because we were still living in Boston), I remember building from cardboard scraps a haunted house.  Course I remember this little cardboard masterpiece as a mansion so I’m sure it was just scotch taped pieces and drawings all over the place.  I was pretty creative even back then so it was probably pretty cool but my desire to have the house hang around on the back porch (a closed-in porch my Dad referred to as his “boudoir”) and eventually my Mom got sick of seeing it and told me to chuck it out.  So, I suppose I reluctantly did.

Now this house building thing it seems has always been in my psyche since the haunted house building days to my gigantic gingerbread house at Christmas (with stained glass windows from melting hard candy which - when finally broken down and thrown out was carried off by some neighborhood dog), so, when I saw this printie, I knew I had to make it and make it better. 

It took a good week of actually printing off all the 22 pages (of which my ink cartridge died so I had to get a new one), cutting and testing a few methods of gluing to see which one took quicker.  But once I got in the groove, the house went together quickly.

I added a few of my own embellishments.  I spread some glue on the grass patches and sprinkled that with brown and green grounds used in train HO landscaping.  Then I added some bushes and even lit the garden lamp with one of my LEDs that I am using for the ryokan dollhouse (I will remove the LED once Halloween is over). 

The last addition was printing off a haunted bride and groom plus a grim reaper from the same Ravensblight page.  I just reduced them down to size and set them up on the porches.  They look sufficiently spoooky.

Fun too is that the haunted house can actually be picked up to reveal a hidden box inside.  I don’t know yet what I want to hide.  Perhaps some candy body parts??

Happy Halloween !!!!


Haunted Bride & Groom

Grim Reaper and his Hour Glass awaits....


Thursday, October 4, 2012

Intermediate Work - The Bamboo Shades, An Iris Plant


Shibuya Town Feed - inspiration for the bamboo shades.
October 1st - 4th 2012

I had seen on a feed some nice fotos of Shibuya in Japan and in one of these fotos, there were these lovely bamboo shades which were hung on the outside of the terraces in many of the two story houses.  It reminded me of the same shading process here in Italy but here they use fabric curtains that just serve to block out the sun and heat during the day.  Most have these rolling full window shades but if you want to move in and out of a door, you need one of these curtains.  So, I decided my ryokan would have some bamboo shades to keep out the heat and sun.

I did some searching on the internet and came across a tutorial where you can use a bamboo placemat as a bamboo shade.  The bamboo slats are the correct scale so all I needed to do was find some bamboo placemats.  Years ago I found a ton and now all of a sudden I couldn’t find any!  As luck would have it, one day at Ikea, in the discount section (where they dump opened packages or the stuff they use in display) there was a nice bamboo placemat for a Euro 1.50.  Can’t go wrong with that! So I picked it up.
Ikea E 1.50 place mat!! Yoohoo!

Glueing the edges where I plan to cut thru
The first thing to do was to glue the slats where I would be cutting since we didn’t want the threads to unravel.  So, after taking some measurements, I glued the top and bottom and waited overnite to be sure the string was hardened and set.  Then I cut using my exacto-knife.  The bottom of the matt was perfect as a support to hang the shade.  I then measured out some black DMC thread, tied one end, threaded it round the back and up the front again and back thru.  The whole ordeal was because I wanted my shades to actually open and close.  I had to find a way to fix the threads across the top and I did that with some bugle beads.  Threading through those was a pain (I had to glue the tip of the floss to a fine point to thread it thru) but eventually I got both threaded and secured.  I used a small orange bead to weight the end of the pull.
Cutring the matts to size for the shade
Threading the bugle beads...

...and glueing them in place so the string would slide.

Glueing the back support (bottom piece of the placemat)


The next part was a little more difficult.  I had to figure out a way to weather the bamboo shades on one side.  I really didn’t like the new look to them.  I generally do not like the whole ryokan looking brand spanking new so the shades had to look a little sun faded.  I tried using household bleach and a paintbrush but it just isn’t concentrated enough.  Neither was hydrogen peroxide.  Only solution was to put some bleach soaked paper towels on the sun bleached side and let them sit on there for around 5 hours.  That did the trick enough to please me.  I then added a little graphite colored paint (has a bit of a blue hue) to make the shades look weathered. 
Top side now slightly weathered, underneath still fairly clean.
Attaching the shades was great since the bottom piece of the placemat was actually almost the exact same width as the space between the top window sill and the under roof beam.  Just a bit of sanding and those fit in perfectly. 

And the shades do go up and down! Fun!


Funky little flower petals - also a find.

The finished vase....
...in situ.


I also found some small terracotta vases which were a good size for the house.  I aged one with some brown and green and then stuffed it with some of the pink flowers I had purchased.  I also found a package of blue purple flowers and used the same method as making the geranium petals - squishing them on the mousepad - then glueing them to a green wire support.  I then inserted an iris that I had purchased from DHE UK site.  I think it looks quite nice on the porch! 

Next will tackle the magnetic closure of the first floor porches.

Thursday, September 27, 2012

Chapter 59 - Left Hand Porch Awnings


Masking tape to hold in place for fitting.
Sanding down one piece for fitting.
September 18 - 27th 2012

This chapter came with the awnings which needed to be fitted onto the outside of the porch.  Fitting was necessary because during the build, the porch is not quite perfectly lined up around.  The instructions had me using double sided tape to keep the pieces in place while I measured and sanded the pieces down to fit.  Course the tape wouldn’t hold so I just used regular masking tape which leaves less damage and holds the pieces on while I sanded then fitted, sanded and refitted etc.


One piece in particular needed some heavy sanding.  It was off by quite a bit.  The trick was to sand to fit the front without distorting the back end.  I had to use the power sander for this one but in the end it seems to fit fairly well.

Next part was adding the underside beaming.  These needed to be spaced about 18mm from each other.  Since the corners need to line up underneath with larger corner beams, I had to leave some spaces on the end to be attached once the awnings are actually installed.  After that, it was just a matter of staining, varnishing and adding in the white tips for the overall decoration. 
Spacing the beams....

Painting the ends of the beams with white.


See through wood!


 In this chapter they gave us a sheet of thin wood paper (for lack of a better word).  The wood was so thin you could see thru it.  First I had to apply the double sided tape to the back, then measure out 1 cm lines where I would cut the wood.  Next was to actually paint some of the pieces darker so I just painted half the board with darker brown paint.  The first awnings on the ground floor we were given white wood board a little thicker than this one.  Consequently, I ended up with quite a few pieces of white shingles.  Something that this piece doesn’t have.  Luckily I saved all the other shingles as well as a sheet of the wood unstained.  Also because in the instructions, they say to stain the cut 1cm strips.  But I learned that this tends to bow out incredibly and I ended up with most of the shingles bowing out (and I still don’t know how to fix that) on the first floor awnings.  It looks rustic and I may play with that look more but I figured if I could get these shingles to lay down flatter it would be better.  Hence painting before and then flattening it under the cutting pad until dry.  Then cutting up the shingles into individual pieces.  It seems they were less bowed so this will be the procedure from now on.
Double sided tape underneath.

1cm height measured out for cutting.
Stained and then.....
...flattened.

Cut up strips around 1cm each, then irregular sized shingles.
Sorted by color for easier application.


Placing the shingles.  A little uneven is nice.
Finished awning.


After painting and cutting them into various width pieces, I began attaching them to the awnings.  The time consuming factor was simply peeling the tape off the back.  It was a total pain in the ass.  The tape never came off cleanly.  So, after a week of peeling, I managed to complete the 4 awnings.  Since they met up sort of off (with too much space) I decided to actually apply a few shingles over the junction of the awnings.  A little glue and masking tape to hold it in place over nite and the trick was done.


Masking tape to hold the awnings in place overnite.

Glue to hold the filler shingles.
Filler shingles did the trick.  Much cleaner.


Clamping the larger underside beams overnite.


 The underside just needed the larger beams and fill in small beams (with painting the tips) and this chapter was complete.  It really was hard to match up the awnings - I even have them off a bit on the right - but instead of unattaching everything that is the way it’s gonna be!

Finished port awnings! Only took a week!

Tuesday, September 18, 2012

Chapter 60a - Attaching the Porches to the House, Attaching the Floors, Intermediate Additions

September 8 - 18th 2012

Finally! As much as the attachments like these stress me out, I’ve been looking forward to attaching these so that the front of the house of the first floor is nearly complete.

Having attached the lower “rooms” with the hinges, I was able to experience a few problems that needed solving for this important stage of work.  Different from the first floor, the porches are more or less hanging free whereas the bottom floor rooms were sitting on a flat surface which made them easier to attach.  Not only, I discovered that the screws they give you for the hinges are very small and strip quite easily.  A few extra are included but a solution had to be found for the probable occurrence of ended up with no screws that would screw anymore...so to speak.

I went with drilling holes with my dremel tool then screwing them in.  As the screws got a bit tight, I had seen a trick in my travels using a rubber band over the screwdriver which “fills” the stripped area and forces the screw into place.  Worked like a charm.  In any case, the real solution was just to purchase more screws, which I did.

The hinges were a tight fit so on the left porch I actually had to sand a little to get them to fit in.  Once in, I used a pushpin to make a starter hole, then drilled to the right depth (once I went a little too far - but pretty much invisible on the outside) then screw in the tiny screws (with the help of the elastic if they got hard to turn).  The porch screws went in pretty quickly I must say.  Much more quickly than the downstairs as I needed Gianluca to give me a hand to give me leverage.  Now the house was heavy enough to be immobile.
Hinges in the package.

Hinge and drill bit.

Pushpin as a hole starter

First set of hinges in.


The tough bit was the attaching the porches to the first floor rooms.  First I emptied fragile items out of the rooms.  Then I opened the lower room so I could use the ceiling of those rooms as a base while I marked where the hinges had to go in the top floor above.  That went pretty well and I figured I could line up the right hand beams and as long as these two beams lined up perfectly, the whole porch would swing closed and line up with the rest of the house.  WRONG.  The porch beams and the house beams are all a bit off so by the time I swung the porch closed, it was not matching up by nearly an inch.  Ugly.  So I had to figure out a way to fix it as much as I could.
Using the lower floor as a gauge

Clearly off but couldn't match it up otherwise the doors don't meet up in the middle.

Only solution was to unattach the top hinge, then using double sided tape, I put a piece on the first floor beam, then one on the hinge, then closed the porch.  The hinge stuck over to the beam and I could see how far off I had to reattach the hinge.  It was crooked looking on the beam but it would still make the porch close somewhat even.  Now I’m only off by about 1/4 inch.  I attached the other porch using the same method of the double sided sticky tape and it worked a charm.  This porch isn’t off at all. 

Closing the two porches together and clearly they butt up against each other a bit. Not really a big deal as I will sand down each lower side beam to be sure they would close.  I am now trying to think how I can attach some little magnets or something so the porches will stay closed.  I have some leftover magnets which I used in making a curtain once but they may be too thick.  Well, I can wait till I get more built then decide.
Porches attached even if the right one is still a bit off.
At this point, I printed off a few pics to put into the bamboo bedroom and the porches.  I choose a geisha print for the music room porch (staying in a colorful theme), and a bamboo painting for over the bed as well as a bamboo kind of painting scroll for inside the bamboo room porch.  The colors seem well suited to the not-so-comfy-chair and table.  I may add the little lantern or some kind of light fixture in the porches - not enabled for actual lighting tho.
Added a pot hanger in the kitchen.

Addition of the bamboo picture over the bed.

Bamboo painting on the porch.

Another colorful geisha for the music room.


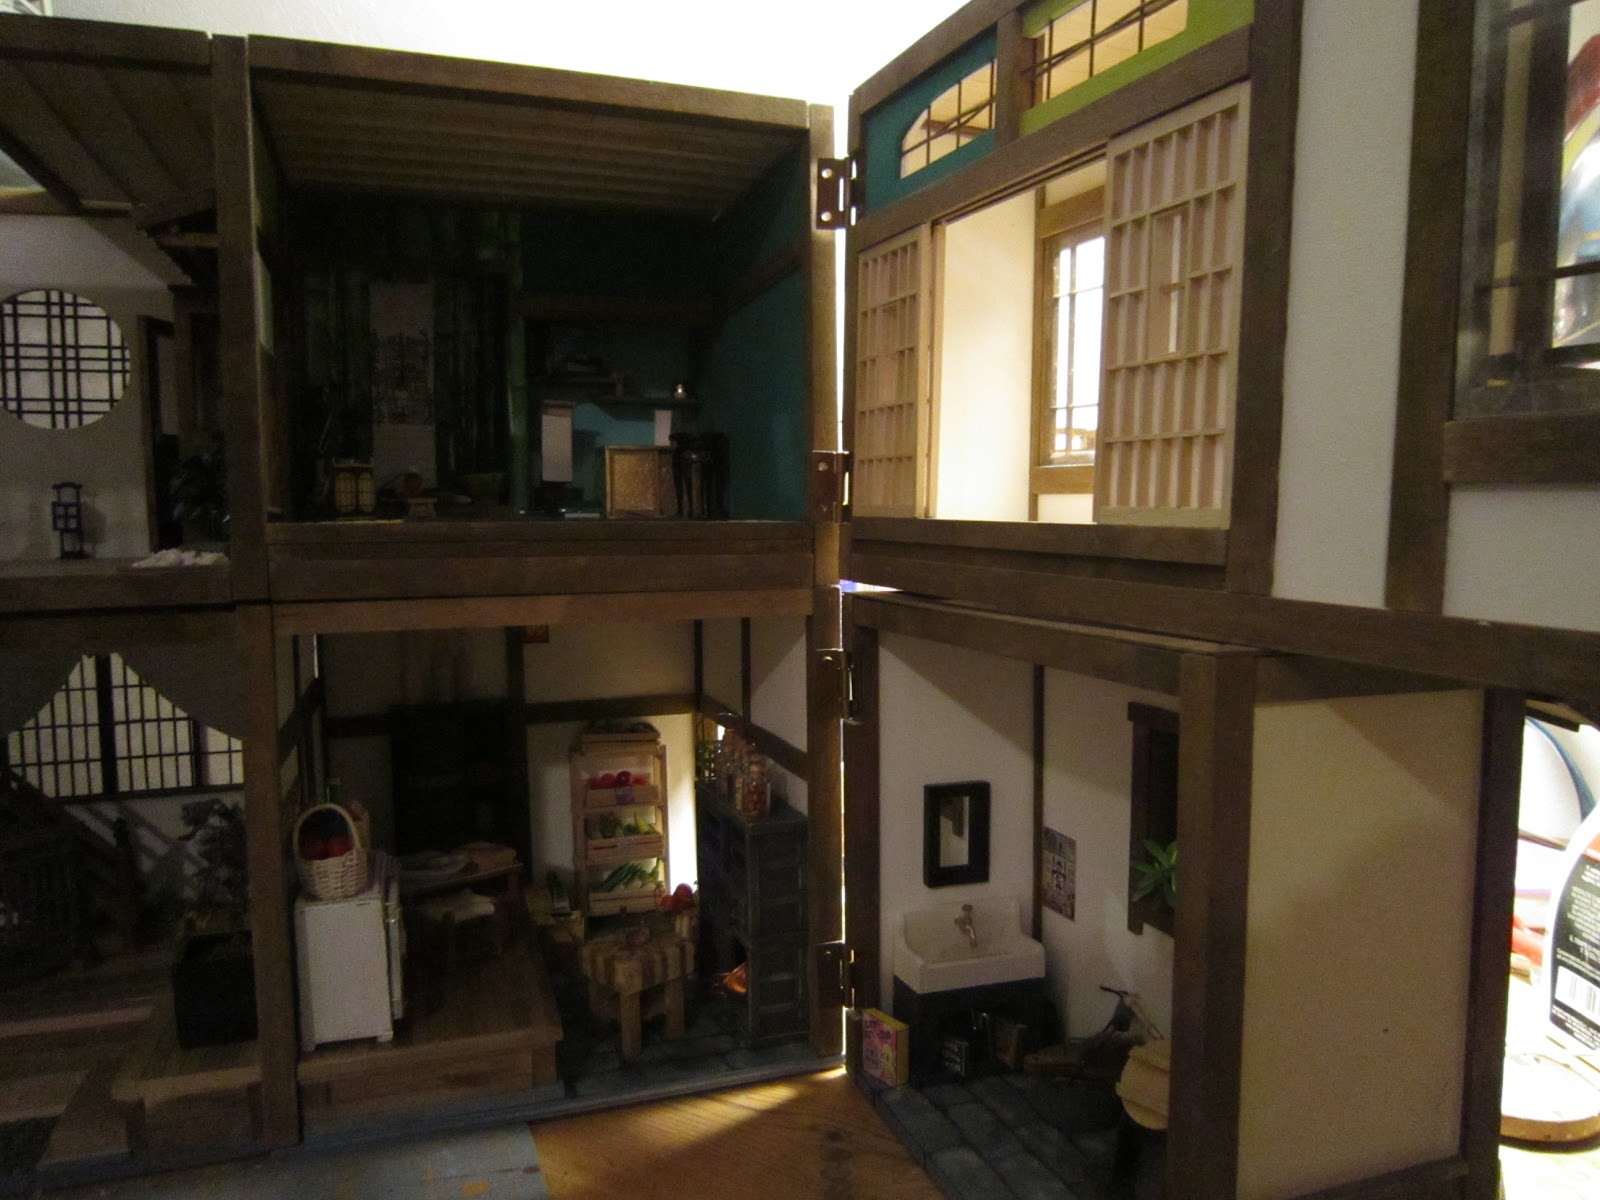
I then tried to tackle the issue with the back of the house.  Clearly this wasn’t meant to be looked at so I think I can get away with some of the additions I want to make here.  First I had to unattach all the cross beam wooden decorations because I am adding two metal plates to permanently fix the floors together.  I’m doing this mostly because I have a fear that as I continue with the build, the stairs in the house are going to get ruined or unattach simply when I move the entire house.  This is due to the fact that the stairs are attached between floors and with floating landings.  To insure stability if (when) I have to actually move this house, I think these little plates will make the difference. 


After removing the beams, attaching the left hand metal support
Drilling left side was no big deal as the wooden sides allowed me to make holes directly into the walls.  The right side was a bigger problem.  The spa was since the beginning severely warped and as a consequence, the back wall jutted out over a quarter of an inch.  I had to sand this down so that the metal brace would lay somewhat flat against the house wall.  The upper screw went in fine but the lower had to be drilled and screwed in at an angle.  Luckily it’s not visible on the inside. 

Right hand side was more of a challenge.  But got it in.


The last part was to reattach the wooden beam decorations cutting and sanding to make them fit in between the new metal supports.  I eventually am going to cover those with some kind of brick patterned paper to simulate exposed walls.  But It’s not as bad looking as I thought it would be. 

Replacing the wooden embellishments.
Sawing off the excess.
Refitted. Now just need to add the last floor and hide the wiring. :-)
 Onwards and upwards (literally).  Next adding the porch awnings and the stairs to the 2nd floor !