December 14th - 19th 2013
As explained, I had skipped this chapter as I felt the firepit required my attention and little ingenuity to pull off. But I finally got around to it.
First was to build the overhang. Pretty straightforward and quick. I had already done three of them so there was no big change in building this one. The time consuming part is measuring out the spacing between the wooden slats. Quick paint job, varnish and white tipping the under beam supports. Then attached over the room doors. Done.
 |
| Spacing the top part of the overhang. |
 |
| The bottom part of the overhang. |
 |
| Finished overhang. |
Problem came up tho when I had to attach the two decorative beam fillers, one over the doors and one in the corner. The one over the door didn’t fit for the same reason as the room’s internal ones - I had made a mistake in the overlap of the vertical slats. Some sanding then a forced glue with clamps did the trick (I hope). We’ll know better when the time comes to fit the ceiling to the landing area on. I will re-enforce it then. The corner piece also was a tight fit but that was a little easier as it required only some sanding.
 |
| Forcing the overhead beam filler. |
On to the firepit - or the irori as it’s called. (I also discovered the name of the hanging hook for the irori - a jizai-kagi) The sunken firepit or hearth was a gathering place and source of heating not just for cooking but also for the room. Usually the rooms were much larger but today there are even many restaurants that use the irori as a focal point for cooking. There is more info on the
kikkoman site which was helpful and informative.
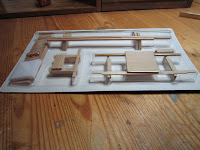
My first task was to figure out a way to squish the battery carrier and the lights into the small hearth frame (appx 28mm square). I fooled around with the foam core piece from the kit as the covering area and then had to cut the wires down to an acceptable length. There was no soldering involved here but I did use my soldering iron to strip the wires. Super fast! I then glued the three fire bulbs onto the foam core support and left them overnite. Next day, I trimmed down the wires some more and glued the actual battery holder into the foam core (and left that too for a while). I then painted the bottom part of the irori and made some more notches to fit the battery in a little better. Then sealed up the connections and glued the wires and switch in place.
 |
| Firepit pieces and the FIRE LED kit from Evan Designs. |
 |
| Gluing in the LEDs onto the foam core. |
 |
| Gluing the switch and the wires into place. |
Once the glue was set, I squished the battery into place and attached the back panel. I didn’t glue it in because I knew I may have to substitute the battery one day so all I will have to do is push from the top and the whole thing will pop out.
 |
| Adding some "ash" and charcoal pieces. |
 |
| Celophane in place and adding more color to the coals. |
Next step was coloring the switch, the top section and painting the inside of the pit a grey color. I also covered the lights with a cellophane film included with the kit. It helps to tone down the flicker and make it a little less intense and more uniform. Once that was glued down, I could add the sand (ashes) and charcoal bits, let those dry and then make some touch ups using some dark grey, grey and white.
The last phase was the top section edge. I glued that on and clamped it down. And the trick was done.
 |
| Finished irori firepit. |
 |
| Making the utensils for the fire pit. |
Only “problem” was that the irori wouldn’t actually accommodate the hanging pot I had already made. The fire coals were higher up than if there were no battery underneath. But I am more than happy making the sacrifice. I added some small utensils for cleaning the pit too. Once I complete a few more things, we can start adding some details to this room too.
Here is a video of the pit in action. You can even hear Christmas music in the background! Yeah!


No comments:
Post a Comment