August 25th - 1st September 2012
I started straight off with the floor lamp thinking it was going to somewhat easy but I was so wrong! Tiny little pieces and cutting out smaller pieces to size. Gluing was a nightmare because the pieces were so tiny. But I did pull it off in the end. I also used a few extra pieces to make a little desk lamp which I will probably put in the bamboo room even if there is no light on the inside. I have it in the foyer for now...it is cute there too.
 |
| Very small pieces.... |
 |
| ...placement with tweezers then painted and varnished... |
 |
| ...glueing the supports to the paper. |
 |
| Finished lantern. Can't even fit a LED inside it's so small. |
 |
| Extra pieces and paper. You can see the kanji only when it's lit. |
I then attached the sliding windows. I glued and painted them then when I went to install them, I realised I had attached the upper sill with glue instead of double sided tape!! It was not supposed to be installed permanently. I nearly broke the wood trying to pry it off. I had to touch up the paint on the outside since it got all scraped up during the attempt to pull of the piece. In the end, I got the windows in (fitting one side by sanding down the previously glued area) and then just fitting the back piece. I was so relieved I managed to get that piece off !!
 |
| Glueing the windows that then had to be stained. |
 |
| 1/4" double sided tape made quick work of attaching the window panes. |
 |
| Placing the windows - view from inside. |
 |
| Outside view. You can see where I damaged the paint job a bit above the windows. |
The last part of this chapter was the roof to the bamboo room. As usual, the ceiling piece was warped and I had to try lots of different methods to remove the bow. I got most of it out but it was a few days between wetting the wood, clamping it down etc. Attaching the front wooden piece took some creative clamping too. Then I just measured off the spaces and glued in the “beams” across the ceiling. It was only half way because the tokonoma uses up part of the room.
 |
| Wetting the board and clamping it over a dowl to dry overnite. |
 |
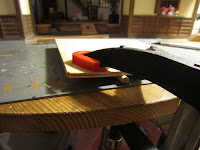
| Glueing the front wood section. I had to clamp a smaller piece of wood to force the bow to glue onto the section. |
 |
| Measuring out the pencil line - just deocration. |
 |
| Glueing on the "beams" that run across the ceiling. |
 |
| Finished ceiling for the bamboo room. |

No comments:
Post a Comment